Ubuntu 20 04 on Amazon EC2
Use Ubuntu 20.04, on Amazon Elastic Compute Cloud (Amazon EC2). We have greatly simplified the parameters that you have to enter to create an instance so that you can get started very quickly. The product launches in a matter of a few minutes and is ready to go.
Parameters
Parameter |
Details |
|---|---|
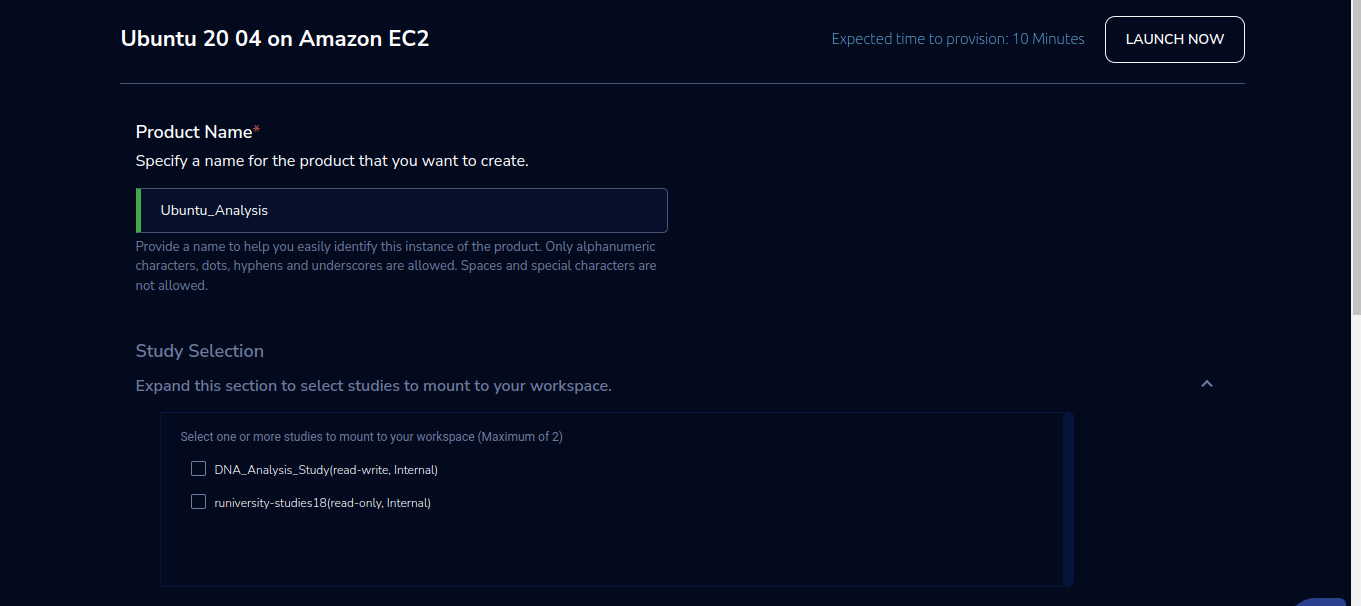
Product Name |
Provide a name to help you easily identify this instance of the product. Only alphanumeric characters, dots, hyphens and underscores are allowed. Spaces and special characters are not allowed. Eg: MedicalResearch |
Study Selection |
Expand the section to select studies to mount to your workspace. Select one or more studies to mount to your workspace from the dropdown list(Maximum of 2) |
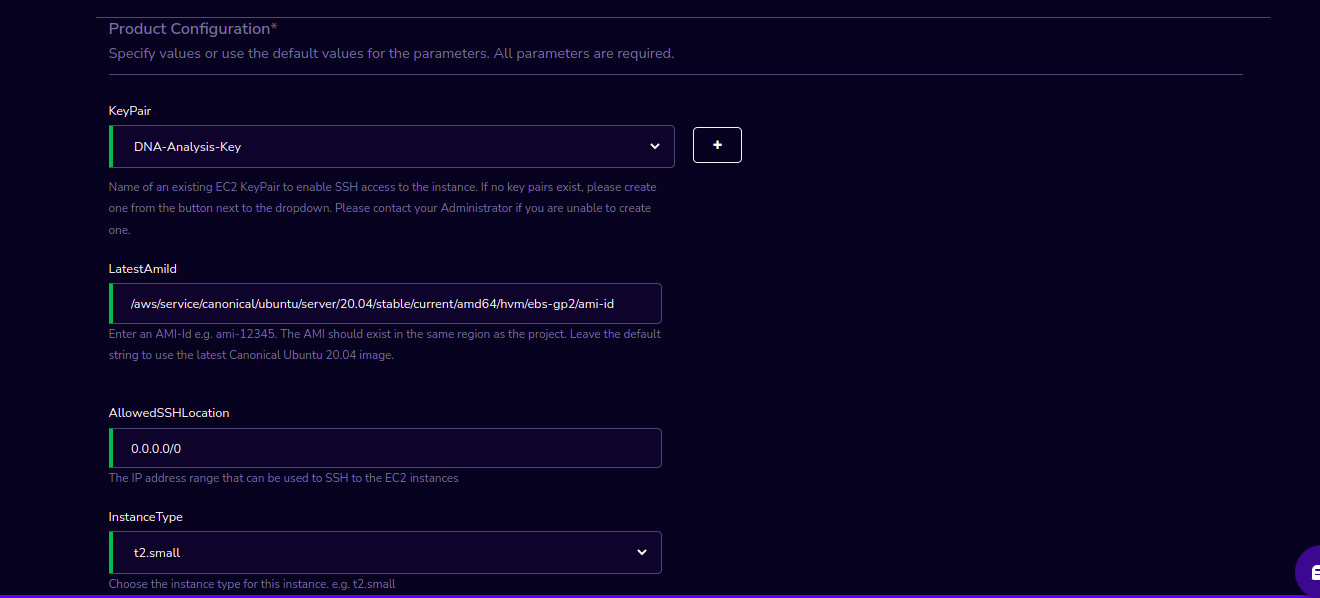
KeyPair |
Choose a KeyPair in the dropdown list. Note: If KeyPair is not available in the drop-down, click on the “+” button. A KeyPair creation form is opened. Fill the details in the form and click on the “Create KeyPair” button. Now that KeyPair is available in the list. Remember to save the private key file securely for future use. Do not share this file with others for the security of your account. |
LatestAmiId |
LatestAmiId - Provide the location from where to pick the latest AMI on which the instance should be based. Valid values are Amazon Linux 2 - /aws/service/ami-amazon-linux-latest/amzn2-ami-hvm-x86_64-gp2. Note: The value provided is for Amazon Linux 2. The valid value for the Ubuntu image should be picked from the Ubuntu yaml file. |
AllowedSSHLocation |
This identifies the IP locations from where connections to this instance should be allowed. For the security of your instance, we recommend you allow connections only from your own location. You can find your IP using https://whatismyipaddress.com/ |
InstanceType |
Choose instance type in the drop-down list Eg: t2.small |
Steps to launch
Click on the project on the “My Projects” page.
Navigate to the available products tab
Click the “Launch Now” button on the “Ubuntu 20 04 on Amazon EC2” product card. A product order form will open. Fill the details in the form and click the “Launch Now” button. You will see an Ubuntu 20 04 on Amazon EC2 being created. In a few minutes, that product should appear in the “Active” state.
Estimated time to provision - 10 minutes
Steps to connect
You can connect to your EC2 instance through the RLCatalyst Research Gateway or via an external SSH client. If you are connecting from a Linux box use the following command: ssh -i <pem-file-path> ubuntu@<host_ip_address> Eg: ssh -i mynewkeypair.pem ubuntu@53.54.55.56
If you are connecting from a Windows box you can use an SSH client like PuTTY.
Click on the project on the “My Projects” page.
Navigate to the “My Products” tab
Click on your instance in the My Products view.
On the product details page, you will find the SSH/RDP button in the Connect pane on the right side. Click on the button to launch the SSH Launcher window in a separate tab of your browser.
Enter “Ubuntu” as the username, select the authentication type from the list and upload the Pem file and click on Submit. The SSH window should open. Run the computation command in.
Through the Explore action you can see the shared files with 1 click. Note: If project storage is not mounted you can’t see the explore action in the product details page.
If you are unable to connect, check your current IP address against the “AllowedSSHLocation” parameter provided at provisioning time.
Other considerations
You can stop your instance using the “Stop” button on the product details page of your instance. The instance will incur lower costs when it is stopped than when it is running. You can also change the instance type when your instance is in a stopped state using the “Instance Type” button on the product details page of your instance.
You can share the product with all the members of the project using the “Share” button on the product details page of your product. If you share the product with the project, you will have to share the PEM key file outside of Research Gateway.
Conversely, if the instance is stopped, use the “Start” button to get the instance “Running”.
You can attach a secondary EBS volume to your EC2 instance. First, create the EBS volume from the available products tab. While launching the EBS product, choose the same availability zone as your EC2 instance (find it in the Outputs tab). Once the EBS volume has been created, go to your EC2 Instance product details page and click the “Attach Volume” button and select the volume from the dropdown. Conversely, you can also detach it by clicking the “Detach Volume” button in the kebab menu on the Product Details tab.
Steps to follow to mount the secondary EBS volume to your EC2 instance:
- Create a file system on the newly created EBS volume. Here we selected the device name /dev/sdf at the time of attaching the volume
sudo mkfs -t xfs /dev/sdf
- Create a folder
sudo mkdir /data
- Mount the volume
sudo mount /dev/sdf /data
You can run the following command in the SSH terminal of your EC2 instance to determine if the EBS volume has been successfully mounted: lsblk
The volume will only be displayed in the list if it has been mounted.
Note
If you have already created the file system on the volume, then skip the command “sudo mkfs -t xfs /dev/sdf”.
For further details please refer to the AWS documentation