Secure Research Linux Desktop
The Secure Research Linux Desktop is a product offered by Research Gateway, that provides authenticated and authorized users access to workspaces that handle sensitive datasets for processing and analysis while minimizing the risk of exposing sensitive data.
The Secure Research Linux Desktop only works in a project enabled for secure research. Follow these steps to enable secure research projects.
A project enabled for secure research only uses Secure Research Linux Desktop product in the catalog. To provision this workspace, launch the product using the following parameters.
Parameters
Parameter |
Details |
|---|---|
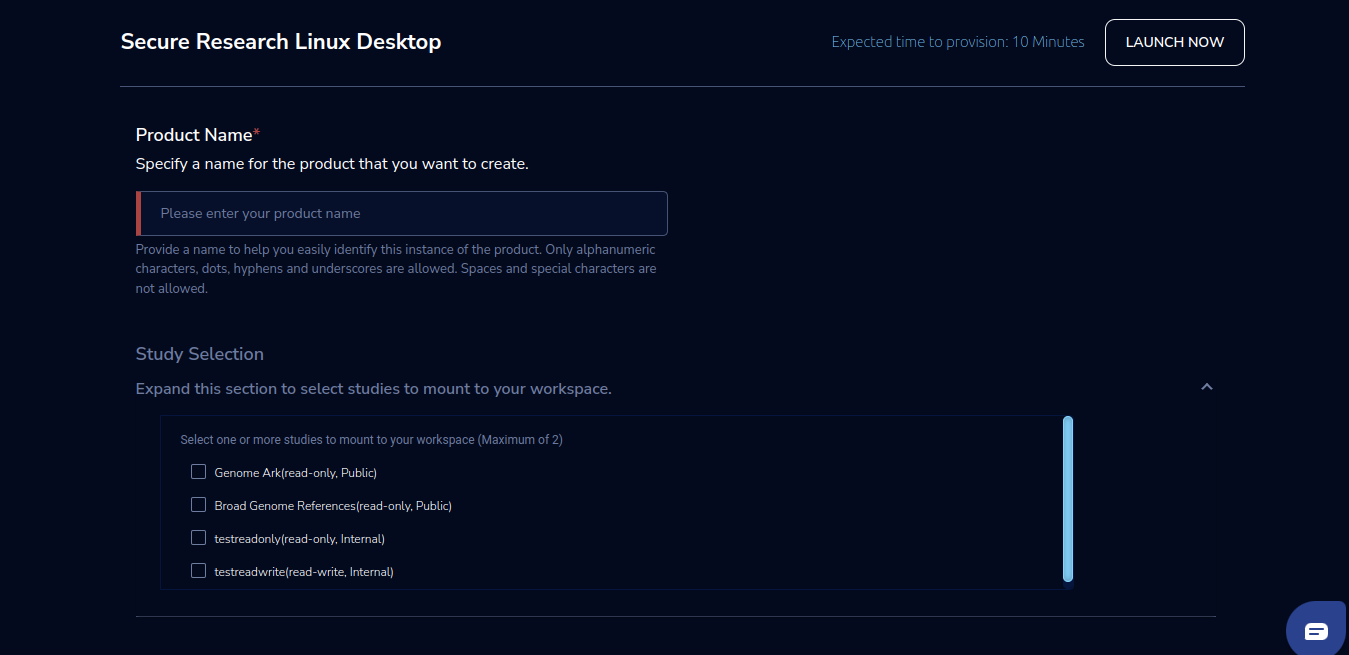
Product Name |
Provide a name to help you easily identify this instance of the product. Only alphanumeric characters, dots, hyphens and underscores are allowed. Spaces and special characters are not allowed. |
Study Selection |
Expand the section to select studies to mount to your workspace. Select one or more studies to mount to your workspace from the dropdown list (Maximum of 2) |
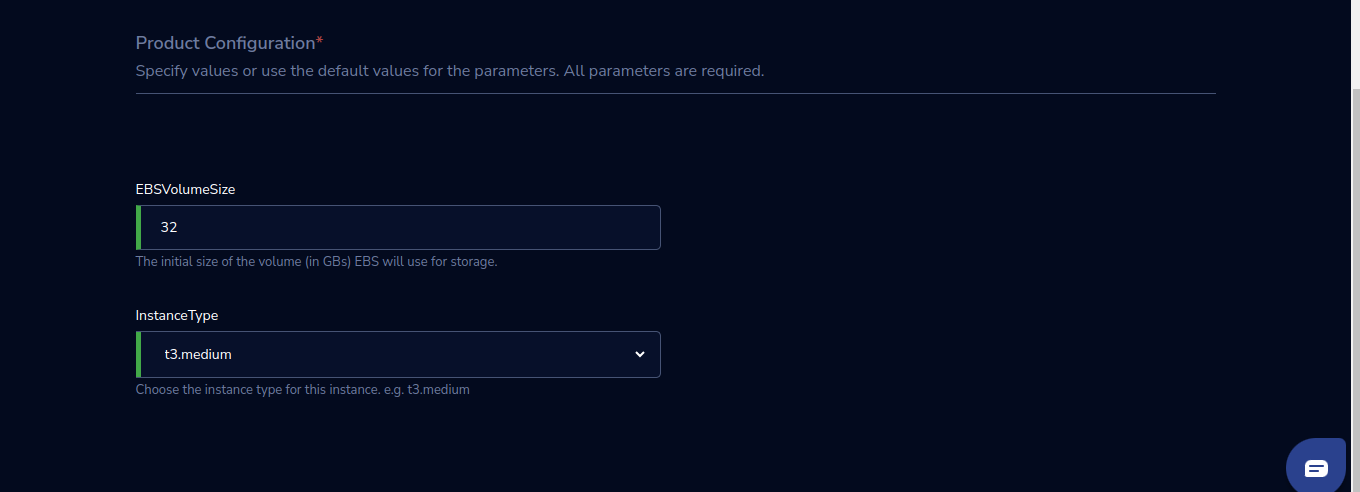
EBSVolumeSize |
The initial size of the volume (in GBs) EBS will use for storage. |
InstanceType |
Choose the instance type for this instance. e.g., t3. medium |


Steps to launch
Click on the project on the “My Projects” page.
Navigate to the available products tab.
Click the “Launch Now” button on the “Secure Research Linux Desktop” Product card.
A product order form will open. Fill the details in the form and click the “Launch Now” button.
You will see a Secure Research Linux Desktop being created. In a few minutes, that product should appear in the “Active” state.
Expected time to provision: 10 Minutes
Steps to connect
Click on “Remote Desktop” under the “Connect” list on the right side of the page. You will be able to see a colored theme.
We have conda and Google Chrome installed by default based on AMI. Users can also install RStudio and Jupyterlab and access it from instance
Once product comes to active click on Remote Desktop action and follow below instructions:
To install and run conda:
Click on Applications-System Tools-MATE Terminal in /home/ec2-user path you will be able to find conda.sh file, run the below command
./conda.sh
Check for the conda version using below command
conda –version
Note
Once conda installs successfully it will restart the machine automatically user will not be able to access machine for around one minute
You can access Google Chrome by performing below steps
Click on Applications-Internet-Google Chrome
You can also install and access RStudio and Jupyterlab in your machine optionally by following steps below:
To install and access RStudio:
Click on Applications-System Tools-MATE Terminal in /home/ec2-user path run below command
docker run -d –restart always -e PASSWORD=<Enter-password> -v /home/ec2-user:/home/ec2-user -p 8787:8787 relevancelab/rstudio_4.2.1:1.0.3
Note
You can use password of your choice in above command and use same password during authentication
Once it is installed successfully run below command and check if its installed
docker ps
Click on Applications-Internet-Google Chrome and access localhost:8787 URL
once connection is successful it will open up RStudio authentication window you can access it using below credentials
Username: ec2-user
Password: You can enter the password which you added in command docker run -d –restart always -e PASSWORD=<Enter-password> -v /home/ec2-user:/home/ec2-user -p 8787:8787 relevancelab/rstudio_4.2.1:1.0.3
To install and access JupyterLab:
Click on Applications-System Tools-MATE Terminal in /home/ec2-user path run below command
docker run -d –restart always –name jupyterlab -p 8888:8888 -v /home/ec2-user:/home/ec2-user relevancelab/jupiterlab_3.5.0:1.0.3
Once it is installed successfully run below command and check if its installed
docker ps
To generate URL for accessing JupyterLab run below command
echo “http://127.0.0.1:8888/lab?token”$(docker exec jupyterlab /bin/bash -c “jupyter server list” 2>&1 | grep token | awk ‘{print $2}’ | sed ‘s/.*=//’)
above command will generate URL for example: http://127.0.0.1:8888/lab?token052fac3fc6c0b2b7f01ece6c5abd55258fde0c3d4d2950f5
Click on Applications-Internet-Google Chrome and access generated URL, once connection is successful it will open up Token Authentication window and add password from URL for example: if this is generated URL http://127.0.0.1:8888/lab?token052fac3fc6c0b2b7f01ece6c5abd55258fde0c3d4d2950f5 this will be Password or Token to be added in it 052fac3fc6c0b2b7f01ece6c5abd55258fde0c3d4d2950f5
You can de-provision the product through the “Terminate” option.
Other considerations
You can stop your instance using the “Stop” button on the product details page of your instance. The instance will incur lower costs when it is stopped than when it is running. Conversely, if the instance is stopped, use the “Start” button to get the instance “Running”.
You can share the product with all the members of the project using the “Share” button on the product details page of your product. If you share the product with the project, you will have to share the PEM key file outside of Research Gateway.
You can also change the instance type when your instance is in a stopped state using the “Instance Type” button on the product details page of your instance.