RStudio
RStudio is an integrated development environment (IDE) for R. It includes a console, syntax-highlighting editor that supports direct code execution, as well as tools for plotting, history, debugging, and workspace management.
Watch a video on how to provision an RStudio product
Parameters
Parameter
Details
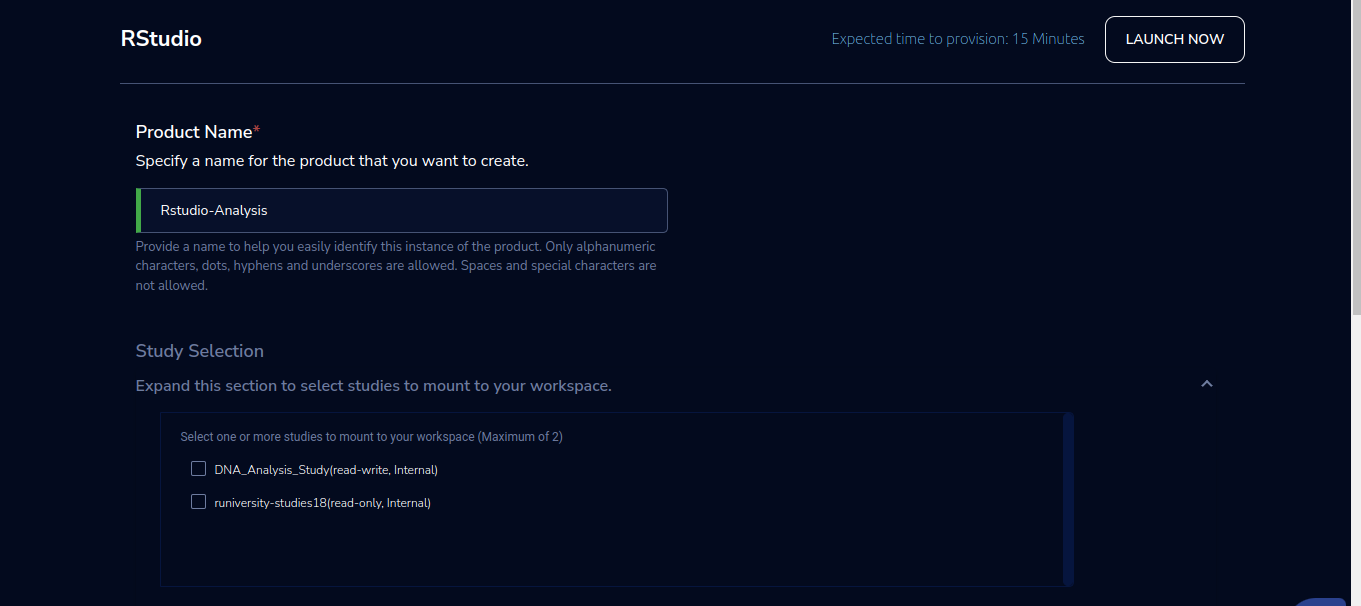
Product Name
Provide a name to help you easily identify this instance of the product. Only alphanumeric characters, dots, hyphens and underscores are allowed. Spaces and special characters are not allowed. Eg: MedicalResearch
Study Selection
Expand the section to select studies to mount to your workspace. Select one or more studies to mount to your workspace from the dropdown list(Maximum of 2)
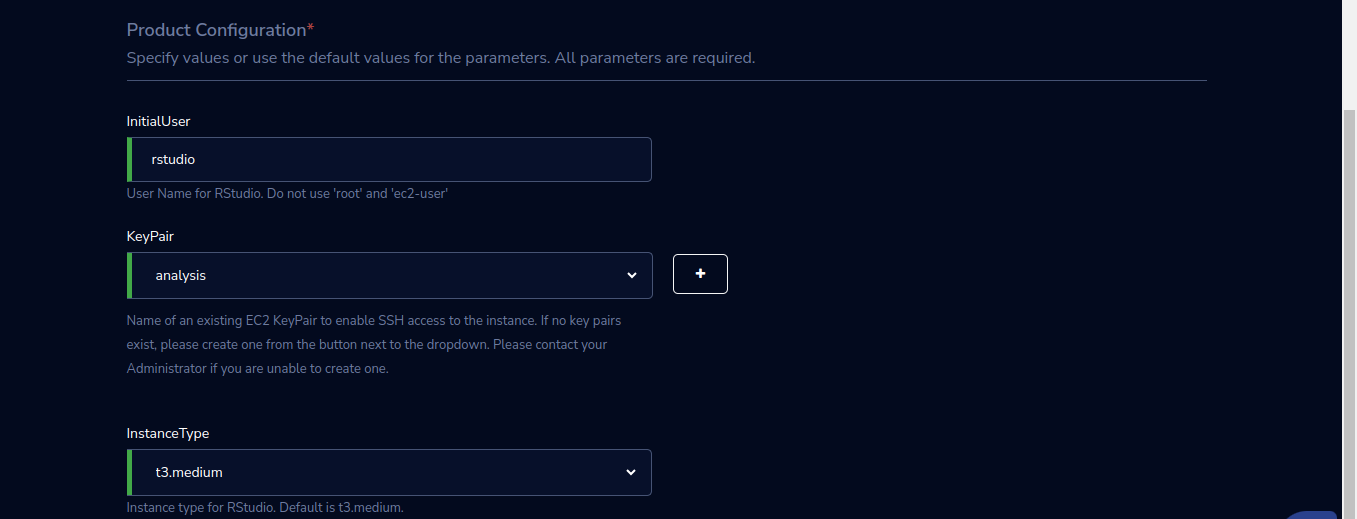
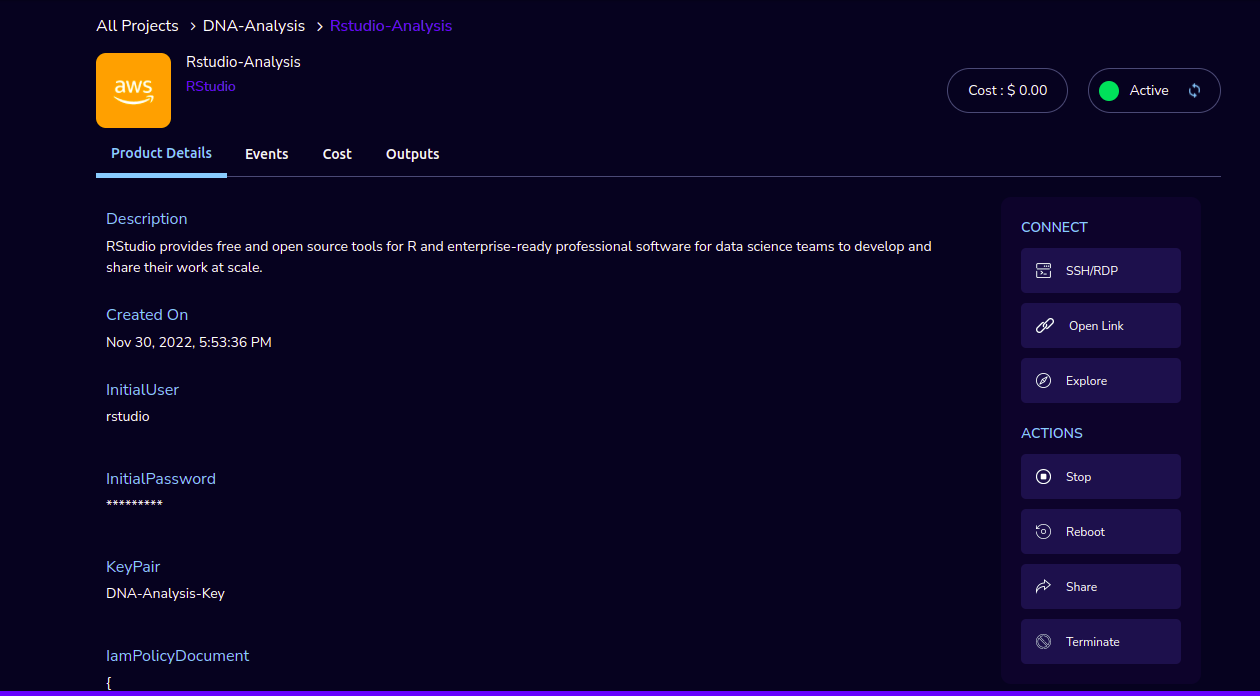
InitialUser
User name for RStudio
InitialPassword
Password for RStudio. Please keep this in your records as this will not be echoed in the CloudFormation Console
KeyPair
Choose the KeyPair in the list. Note: If KeyPair is not available in the drop-down, click on the “+” button. A KeyPair creation form is opened. Fill the details in the form and click on the “Create KeyPair” button. Now that Keypair is available in the list. Remember to save the private key file securely for future use. Do not share this file with others for the security of your account.
InstanceType
Choose instance type in the drop-down list for RStudio. Eg: t2.micro
Steps to launch
Click on the project on the “My Projects” page.
Navigate to the available products tab.
Click the “Launch Now” button on the “RStudio” product card. A product order form will open. Fill the details in the form and click the “Launch Now” button. You will see an “RStudio” being created. In a few minutes, that product should appear in the “Active” state.
Estimated time to provision - 15 minutes
Steps to connect
Click on “Open Link” under the “Connect” list on the right side of the page. This will open the Rstudio in a new browser tab.
Click on the “SSH” button under the “Connect” list on the right side of the page. This will open the SSH Window in a new browser tab.
Enter “ec2-user” as the username. Select “Pem file” as the Authentication type. Upload the pem file in the “Pem file” field. Click Submit. You should now be connected to the EC2 instance via SSH. Scroll to the top of the Terminal screen and click the “Terminate” button to end the session. Alternatively, type exit and hit enter in the terminal.
Through the Explore action you can see the shared files with 1 click.
Note
If project storage is not mounted you can’t see the explore action in the product details page.
Other considerations
You can stop your instance using the “Stop” button on the product details page of your instance. The instance will incur lower costs when it is stopped than when it is running. You can also change the instance type when your instance is in a stopped state using the “Instance Type” button on the product details page of your instance.
You can share the product with all the members of the project using the “Share” button on the product details page of your product. If you share the product with the project, you will have to share the PEM key file outside of Research Gateway.
Conversely, if the instance is stopped, use the “Start” button to get the instance “Running”.
You can attach a secondary EBS volume to your EC2 instance. First, create the EBS volume from the available products tab. While launching the EBS product, choose the same availability zone as your EC2 instance (find it in the Outputs tab). Once the EBS volume has been created, go to your EC2 Instance product details page and click the “Attach Volume” button and select the volume from the dropdown. Conversely, you can also detach it by clicking the “Detach Volume” button in the kebab menu on the Product Details tab.
Steps to follow to mount the secondary EBS volume to your EC2 instance:
- Create a file system on the newly created EBS volume. Here we selected the device name /dev/sdf at the time of attaching the volume
sudo mkfs -t xfs /dev/sdf
- Create a folder
sudo mkdir /data
- Mount the volume
sudo mount /dev/sdf /data
You can run the following command in the SSH terminal of your EC2 instance to determine if the EBS volume has been successfully mounted: lsblk
The volume will only be displayed in the list if it has been mounted.
Note
If you have already created the file system on the volume, then skip the command “sudo mkfs -t xfs /dev/sdf”.
For further details please refer to the AWS documentation